How to Install Floating House Numbers on Brick Exterior
- aisha b
- Dec 26, 2024
- 4 min read
Updated: Jan 8
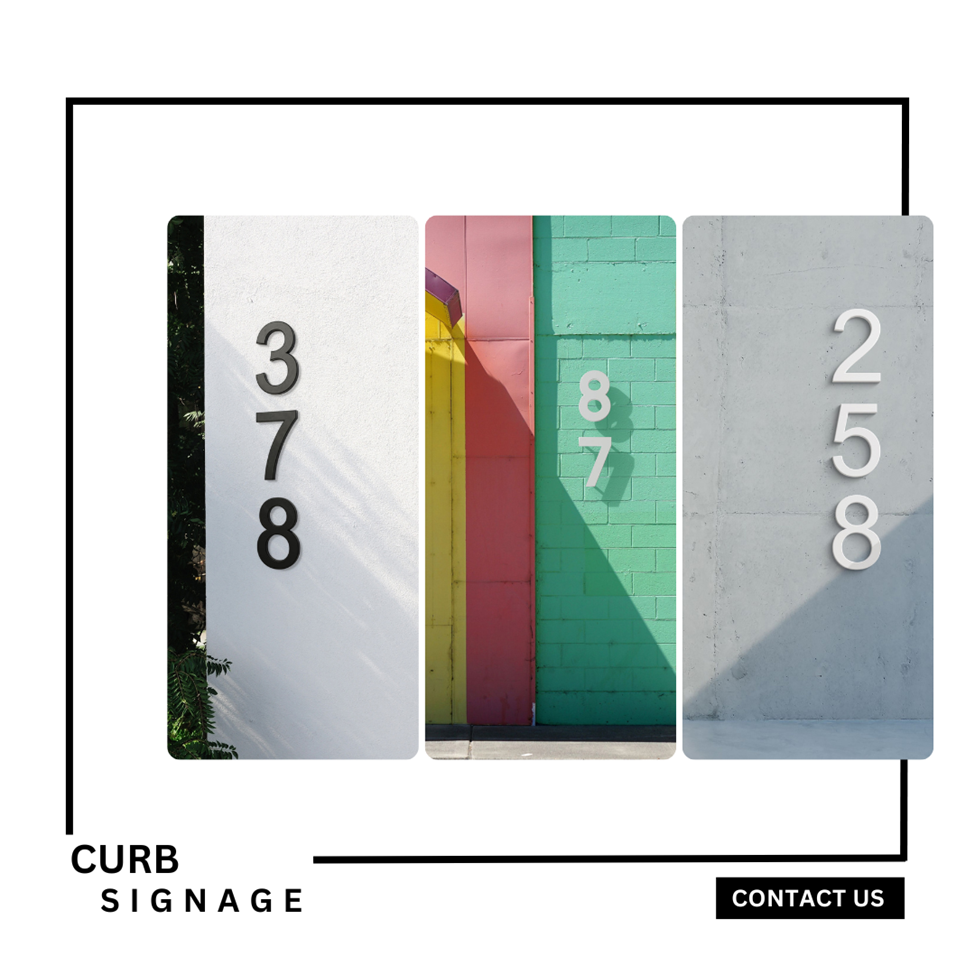
Explore practical tips from Curb Signage to boost your home's curb appeal. Install stylish floating house numbers and give your exterior a modern, polished look.

Key Points
Preparation and Planning: Choose a visible location, use templates for accurate marking, and ensure your measurements are precise for a clean, modern look.
Drilling and Anchoring: Use a hammer drill with the correct masonry bit, drill carefully into marked points, and install wall anchors securely to hold the numbers in place.
Mounting and Adjusting: Attach spacers for the floating effect, secure numbers with screws, and check alignment with a level for a polished finish that enhances curb appeal.
Your home’s curb appeal is the first impression visitors or potential buyers get. Suppose you’re giving your home’s exterior a modern makeover and want to add a sleek, contemporary touch. Floating house numbers can do just that, they are stylish, eye-catching, and give your home an instant boost in curb appeal. The best part? You can easily order them online at Curb and skip the hassle of visiting a store.
But once those numbers arrive, you might be wondering: How do I install these on brick? If the thought of drilling into masonry makes you hesitate, don’t worry. The process is simpler than you think, and we’re here to walk you through every step. From tools and prep work to getting those numbers straight and secure, this guide has you covered.
Let’s get started!
Materials and Tools Needed
Before you jump into drilling, make sure you have everything ready to go. Here’s what you’ll need:
Materials:
Floating house numbers (with spacers and screws included)
Wall anchors (suitable for masonry)
Exterior-grade epoxy (optional, for extra security)
Painter’s tape (for marking positions)
Tools:
Hammer drill (you’ll need the extra power for brick)
Masonry drill bits (matched to the size of your screws and wall anchors)
Level (to keep those numbers straight)
Measuring tape (accuracy is everything here)
Pencil (for marking drill points)
Safety gear (glasses, gloves, and a dust mask)
Having the right tools makes this job much easier. Plus, you’ll avoid that frustrating trip back to the hardware store halfway through the project.
Step 1: Planning and Preparation
First things first, plan where your house numbers will go. This isn’t just about slapping them on the wall; a little thought goes a long way.
Choosing the Location
Pick a spot that’s easy to see from the street. The numbers should be visible and unobstructed by plants, decorations, or shadows. Near the front door, porch, or garage is usually ideal. Think about the background color, too.You want your numbers to stand out, not blend in.
Measuring and Marking
Use a measuring tape to figure out the exact placement. Floating house numbers come with a paper template to help you line things up. If not, you can create one yourself by tracing the numbers on a piece of paper and marking where the screws will go.
Stick the template on the brick with painter’s tape. Use a level to make sure it’s perfectly straight as crooked numbers will ruin the look. Mark the drill points with a pencil so you know exactly where to drill.
Step 2: Drilling the Holes
Time to break out the hammer drill. This step might seem daunting, but with the right technique, it’s pretty straightforward.
Choosing the Right Drill Bit
Use a masonry drill bit that matches the size of your screws and wall anchors. For most floating house numbers, a 3/16-inch or 1/4-inch bit works well. Check the instructions that came with your numbers to be sure.
Drilling Technique
Put on your safety gear, dust and debris will fly. Position the drill on your marked points and hold it steady. Start drilling slowly to create a guide hole, then apply steady pressure as you drill deeper. For brick, you’ll typically need to drill about 1.5 to 2 inches deep.

Step 3: Installing Wall Anchors for Floating House Numbers
Now that your holes are drilled, it’s time to install the wall anchors. These little guys ensure your screws stay secure in the brick.
Inserting the Anchors
Choose wall anchors that fit snugly in the drilled holes. Gently tap them in with a hammer until they are flush with the surface of the brick. Don’t force them in , you want them tight but not squished.
If the anchors are loose, the numbers won’t stay in place. If this happens, consider using a bit of exterior-grade epoxy to hold them securely.
Step 4: Attaching the House Numbers
You’re in the home stretch. Now it’s time to get those numbers mounted and look sharp.
Attaching the Spacers
Floating house numbers come with spacers to create that cool "floating" effect. Attach the spacers to the back of each number according to the instructions. Double-check everything is aligned correctly.
Mounting the Numbers
Line up the numbers with your drilled holes and gently insert the screws into the wall anchors. Tighten them with a screwdriver or drill, but don’t overtighten, you don’t want to crack the spacers.
Use a level one last time to make sure everything is straight. Adjust if necessary.
Step 5: Final Adjustments and Maintenance Tips
Take a step back and admire your work. Your new floating house numbers should look sleek and modern.
Final Check
Ensure all numbers are secure and properly aligned. If something looks off, now’s the time to fix it.

Installing floating house numbers on brick might seem challenging, but with the right tools and a bit of patience, it’s totally doable. Plus, the end result is worth it, a sleek, modern look that boosts your home’s curb appeal.
Have any questions or tips to share? Drop a comment and let’s connect!
Comments